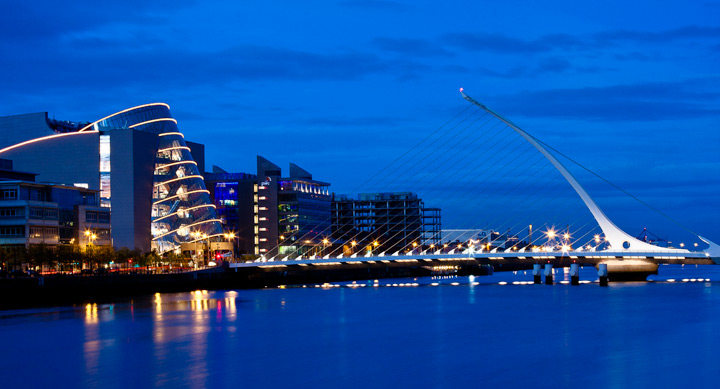
I wrote this short piece late September for publication in the Charlottesville Camera Club Focus newsletter for October 2012. I don’t know why I didn’t think of it then, but I am finally posting it here for anyone to see. Enjoy!
Last week in Ireland I was walking towards a pub for dinner on a dismally dark overcast day and noticed that some exterior lights were emitting a soft glow against the building. I rapidly brought my camera up to take a quick “record” shot of the building and so without breaking stride I cranked up the ISO and opened up my aperture to get a shutter speed of 1/30 sec. But what I saw on my LCD monitor stopped me in my tracks – on the screen was the most beautiful blue sky which was certainly not the way my eye perceived that dismally flat gray sky. I had inadvertently found the “blue moment”.
The “blue moment”, or “blue hour” is the period of twilight (neither full daylight or fully dark) about 30 minutes after sunset or before sunrise and, in spite of its name, usually lasts about 30 minutes. It begins in the eastern sky and progresses to the west, and water also appears a brilliant blue. Because you don’t have much time to catch it, you usually have to plan for it – get to the subject you want to showcase and set up in advance.
The best subjects are those that are lit at night – cityscapes, city streets, buildings, bridges, monuments, fountains, etc. For these scenes a wide-angle lens may be best, or the smallest mm possible on a zoom lens, but photos can be composed suitable to any lens. The best quality photos are shot with the lowest ISO possible to avoid any noise in the beautiful blue sky, and since light is limited it will require a long exposure. That is why a sturdy tripod is essential. To further increase image quality turn off image stabilization, use mirror lock-up to avoid vibration, and use either a remote shutter release or the 2 second timer. I primarily shoot in aperture priority at f/16 or smaller to get the starburst pattern from the lights.
Focusing is the most critical element. Be sure to gain focus while the light is not too dim – if you will be staying stationary you can autofocus then switch to manual focus, being careful not to bump the focus ring anytime after that. If you move about keep all focus points active, and once you can no longer autofocus you can use liveview and manual focus, or use a torch to illuminate your subject enough to focus – whatever works in the situation. After taking your first shot be sure to check the LCD to determine if you have captured the blue moment. You may have to take several photos over a brief period of time until you see the blue. Once you start shooting the blue consult your LCD after nearly every shot to tweak your exposure so as to not excessively blow out the lights – the center of the lights will be blown out (use your blinkies) but these should only be pinpoints. Correct the exposure with exposure compensation if you are using aperture priority, or change your manual exposure settings as needed.
Voila – beautiful photos!
From a few months before….

